
Heat Exchanger Project
Building a Heat Exchanger
During my fourth year of undergraduate studies, a few of my friends and I built our own heat exchanger! We modeled our heat exchanger after the shell and tube model, and it was designed to attach to the Armfield HT30XC testing unit.
In this testing unit, water is heated by a 2kW heater in a hot water reservoir and then pumped through the inner (stainless steel) tubes. The flow rate of the hot water and the temperature of the hot water reservoir are controlled through a GUI on a PC. Ice water from a large cooler is pumped through the annulus created between the inner metal tubes and the clear acrylic outer tubes. The flow rate of the cold water is controlled by adjusting the power to the cold water pump directly.
Goal: Create and build a heat exchanger that has a higher overall power density of W/m^3 than the Armfield Tubular Heat Exchanger with a budget of $150.
Design & Iteration
-
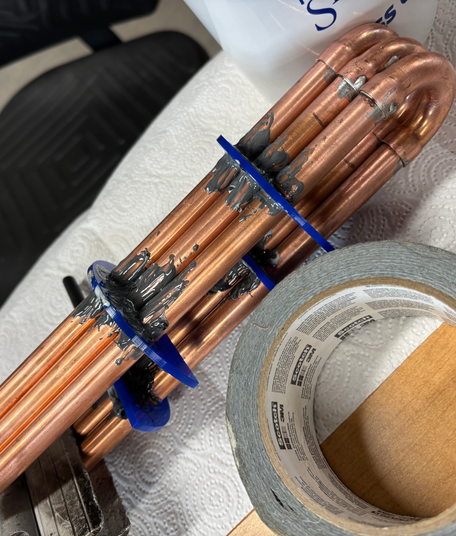
I designed the shell & tube heat exchanger with 3 copper tubes to guide hot water flow & acrylic baffles to guide cold water flow
-
Our design doubles the number of baffles compared to the Armfield HT30XC - allowing for a more turbulent flow, increasing the convective heat transfer between the fluids and increasing overall efficiency. The Armfield HT30XC also lacks proper insulation in many areas. The shell of the design uses acrylic, which has poor thermal insulation, leading to increasing heat loss.
-
Our design utilizes copper, which has a significantly higher thermal conductivity, allowing for faster and more efficient heat transfer, compared to Armfield's use of stainless steel, which has a lower thermal conductivity.
-
Our heat exchanger doubles the amount of area through which heat is able to transfer. The Armfield heat exchanger utilizes shorter tubes, while our design uses longer and 5 thicker tubes that have a 180-degree bend. Our copper tubes are longer, which allows for greater surface area contact between the hot and cold water, compared to the Armfield heat exchanger. The 180-degree bend allows for even more contact surface area between the hot water and the cold water.
-
Iterated through multiple designs
-
Gathered feedback from engineers & peers to review which materials would be best suited to increase the W/m^3
Rapid Prototyping & Fabrication
-
Soldered copper tubing, laser-cut acrylic baffles, and used epoxy as sealant to guide cold water through the PVC pipe
-
Assembled and epoxied all components together with JB-Weld
Matlab Simulation
-
Modeled the performance of our heat exchanger that took an input of the inlet temperature of the cold and hot water
-
Assuming a set flow rate of 2 liters/s
-
Modeled the thermal efficiency, overall heat transfer coefficient, heat transfer effectiveness, rate of heat removed from the hot water (W), and rate of heat transferred to cold water(W)
Total cost (including fabrication): $150.00
Skills Used:
-
Design
-
Rapid Prototyping
-
Data Analysis
-
Drill pressing and soldering
-
Matlab Coding
-
Tube Bending
Industry Standard

Modeled after Original Shell & Tube HE


Our Prototype

